본문 바로가기
My/works

이클립스에서 (java) hive thrift 연동하여 실행하기

by matt131 2013. 1. 28.
반응형

이클립스에서 Hive Thrift 연동하기


이클립스에서 하이브 Thrift 연동하는 방법에 대해 알아보자.

관련 내용에대해 포스팅된 곳을 찾아보았으나 찾기가 쉽지 않아 직접 찾아낸 방법을 포스팅한다.

아침부터 적으려니 배고픔..


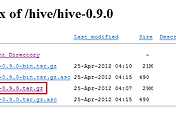
하이브 설치가 안되어있다면 설치 먼저~

Hive (하이브) 설치 및 환경구축하기


 이클립스에서 하이브 연동하기


이클립스에서 자바 프로젝트를 생성한 후 라이브러리를 추가한다.


생성된 프로젝트를 우클릭하여 'properties' 클릭

'Java Build Path - Libraries' 에서 'Add External JARs...' 클릭하여 다음 라이브러리를 추가한다.


추가해야할 라이브러리 목록


hive-jdbc-버전.jar
hive-exec-버전.jar
hive-metastore-버전.jar
hive-service-버전.jar
hadoop-core-버전.jar
commons-logging-버전.jar
log4j-버전.jar
libfb버전.jar
slf4j-api-버전.jar
slf4j-log4j12-버전.jar


해당 라이브러리들은 hadoop 설치 폴더와 hive 폴더안에 모두 들어있다.


위 그림과 같이 라이브러리들이 추가될 것이다.


 java 샘플 소스 작성하기 


프로젝트에 'HiveJdbcClient' 라는 이름으로 java class를 생성한 후,

하단의 샘플 소스를 참고하여 소스를 작성한다.


import java.sql.SQLException;
import java.sql.Connection;
import java.sql.ResultSet;
import java.sql.Statement;
import java.sql.DriverManager;

public class HiveJdbcClient {
  private static String driverName = "org.apache.hadoop.hive.jdbc.HiveDriver";

  /**
 * @param args
 * @throws SQLException
   */
  public static void main(String[] args) throws SQLException {
      try {
      Class.forName(driverName);
    } catch (ClassNotFoundException e) {
      // TODO Auto-generated catch block
      e.printStackTrace();
      System.exit(1);
    }
    Connection con = DriverManager.getConnection("jdbc:hive://localhost:10000/default", "", "");
    Statement stmt = con.createStatement();
    String tableName = "testHiveDriverTable";
    stmt.executeQuery("drop table " + tableName);
    ResultSet res = stmt.executeQuery("create table " + tableName + " (key int, value string)");
    // show tables
    String sql = "show tables '" + tableName + "'";
    System.out.println("Running: " + sql);
    res = stmt.executeQuery(sql);
    if (res.next()) {
      System.out.println(res.getString(1));
    }
    // describe table
    sql = "describe " + tableName;
    System.out.println("Running: " + sql);
    res = stmt.executeQuery(sql);
    while (res.next()) {
      System.out.println(res.getString(1) + "\t" + res.getString(2));
    }

    // load data into table
    // NOTE: filepath has to be local to the hive server
    // NOTE: /tmp/a.txt is a ctrl-A separated file with two fields per line
    String filepath = "/tmp/a.txt";
    sql = "load data local inpath '" + filepath + "' into table " + tableName;
    System.out.println("Running: " + sql);
    res = stmt.executeQuery(sql);

    // select * query
    sql = "select * from " + tableName;
    System.out.println("Running: " + sql);
    res = stmt.executeQuery(sql);
    while (res.next()) {
      System.out.println(String.valueOf(res.getInt(1)) + "\t" + res.getString(2));
    }

    // regular hive query
    sql = "select count(1) from " + tableName;
    System.out.println("Running: " + sql);
    res = stmt.executeQuery(sql);
    while (res.next()) {
      System.out.println(res.getString(1));
    }
  }


위 소스에서 "jdbc:hive://localhost:10000/default", "", "" 의 localhost 는 접속할 ip 주소를 입력한다.

소스작성이 완료되었으면 해당 예제 테스트를 위해 서버단에 a.txt를 생성하여야 한다. 서버단에서 아래의 명령어를 입력하면 된다.


$ echo -e '1\x01foo' > /tmp/a.txt
$ echo -e '2\x01bar' >> /tmp/a.txt


 이클립스 단에서 hive 실행하기 


Hive Thrift Server를 실행한다.


$ HIVE_PORT=10000

$ $HIVE_HOME/bin/hive --service hiveserver &


위 그림과 같이 HIVE Thrift Server 가 시작될 것이다.


그럼 이클립스에서 소스를 실행한다.


위 그림과 같은 결과가 나온다면 정상적으로 실행된 것이다.

출력결과는 생성한 testHiveDriverTable의 describe, /tmp/a.txt 의 내용, testHiveDriverTable 의 count 수이다.

소스를 살펴보면 이해갈 것이다.

반응형